Monday, 16 January 2017

Superhero Lair - the next chapter in the making...

This is the second installment of making the Superhero Lair for my nephew for Christmas.


To finish off the back wall of the lower section of the Superhero Lair required a trip to Spotlight for appropriate scrapbooking paper.  I really wanted to use a colour from the initial scrapbooking paper to continue the funky theme.


I choose a light green paper to tone in with the circle colours on the original paper.  As you can see below, I used the cutoff from the green paper to accent the top section of the lair and part of the second piece of the circle paper to break up the green in the botton section of the lair.  I also used brown scrapbooking paper again for the flooring.  It was neutral and complemented the green and circular pattern.


I choose some green striped and brown zig-zagged material at Spotlight for the couch and cushions for the seating and got somethings for making the table.  I envisaged the skinny poles going through the holes on the big ice cream sticks and the wooden balls being stoppers at the top and bottom of the legs.  Yeah.  Right.


I already had some wooden blocks, so I (badly) glued them together and painted them blue for the seat for the table.


I painted the sticks for the legs of the table.


I stuck a whole lot of big ice cream sticks together for the top of the table.  I wonder if you can figure out where I went wrong yet...


I started making a couch.  I glued sponge to the bottom of a cardboard present box.


I started to wrap it in the green striped material.  I used hot glue to secure it all.


This is the back of the couch.  Not that I cut the corners off the part that I want flat against the main box.


This is the couch all stuck together... for an action figure it is probably just a chair actually...


And the couch in situation...


I then started to make a footstool/coffee table.  I had a round present box.  I glued on some of the paper from the wall that was left over.


I then covered the lid with the brown zig-zag material, gluing it on with an all purpose paste.


I made some pillows.  I cut the sponge in half so it was half the thickness the sponge usually is.  The flip sid of the pillows are not flash.  Something I will need to improve upon.


To cover my horrific pillow making I hot glued on a button.  I'm not confident these pillows will be robust.


The table has been challenging.  I should have put it all together before painting because once I painted the sticks and the table top, the sticks would not go through the holes.  So I had to do a complicated bit of engineering.  It is rather wobbly however.


The chair to go with the table is made of four wooden blocks glued together and painted blue.  I added the scrapbooking paper from the walls to tie it all in.  I made the cushion part of the seat by getting a bit of card in the same shape as the blocks, gluing sponge onto the card and then wrapping around and gluing on the material.  Then I glued the cushion to the blocks.


And this is the finished product for my nephew's Christmas present below.  Goodness knows how long all this handmade furniture will last... particularly if my niece gets her hands on it!


Wednesday, 28 December 2016

Vintage Pram Do-Up!!!

August:
This pram is vintage.  It used to be my Aunty Anne's, my Dad's oldest sister, pram when she was a little girl - and she is now 76!  Then her daughter had it, and then I got it, and now I am getting it done up for my niece for her Christmas present this year.


Like the dollhouse, it has been in the shed for a number of years, exposed to dirt, bugs, rodents and shed cats.  But despite that it is still in reasonable condition, and after a bit of sugar soap it came up quite a bit cleaner... ok a bit of work with a rag won't go astray.


I am intending on taking it to a professional for an inspection and to fix one or two annoying features. 


December:
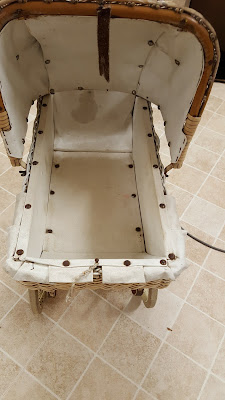
Well due to a tight financial situation, this pram did not go to a professional to fix.  In the end I felt it would just have to get a good clean.  As you can see below it was a wee bit manky.  So I started off with a vacuum clean all over inside and out.


And then I took to it with a cloth and warm water with sugar soap in it.  Then for good measure I went over the wheels, which were especially dirty, with a toothbrush and some bathroom cleaner.  I then hosed the wheels off outside.


I think you will agree that the wheels are much cleaner now.


I was going to make the bedding considering all the stuff I had as a child is currently in storage and inaccessable.  So I went to a shop in Hamilton called Purple Patch.  They have a lot of handmade toys and knitted baby outfits.  They had a new mattress (which is good because my old one was my Mum's too, and it has seen better days).


I was able to source a nice lemon sheet - much cheaper than if I bought the material and then cut and hemmed it.


They had this lovely lemon and blue cover as well.  Much nicer than I would have made.


And here is the pram all made up.  You can see that broken leather strap that is supposed to hold up the hood of the pram.  I think my bro can fix that up.  I hope my niece appreciates this vintage pram for Christmas.  She has plenty of dolls to put in it.


Friday, 23 December 2016

Super Hero Lair - the beginning.

The other week I took my six year old nephew to school and stayed for a while so he could show me all his artwork and writing on the walls and wires.  His letter to Santa caught my eye.  Naturally he wanted an iPhone and charger and more Lego, but he also wanted a house for a superhero.  I think that came about because of his sister getting a dollhouse.


So I started putting my thinking cap on.  How could I do this for him....


I went to The Warehouse and looked at bookcases.  I decided the best one to get was one that normally had three spaces in it.  At $15 for one of these bookcases I would be a fool not to use them.  However, an action figure like the ones my nephew has would be too tall for the space.  So my brother helped my drill holes at the half-way mark and we put the shelf together with two bigger spaces.


I accidentally put the back on the wrong way round.  But that actually worked to my advantage.  I wanted to paper the back wall in a different colour to mitigate the blackness of the shelf itself and the paper would glue better to the wood side of the back panel, with a bit of a rub with some sandpaper first, rather than the shiny black laminate.


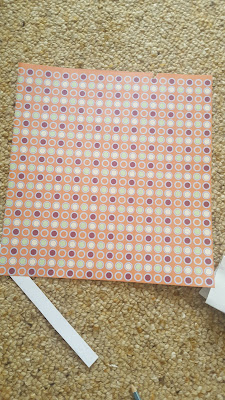
I went through my scrapbooking paper and this was the one piece I felt I c ould use with a superhero.  I had two pages of it.


I used the shelf that we didn't put into the bookcase as the guide for how wide I needed to trim the paper.  The paper was not tall enough, so I had to use part of the second paper to finished the first wall.  I did not have enough paper to complete the back wall in the lower section.


I decided to decorate the walls left and right with maps and pictures of superheroes.  So I cruised through the net and found these pictures, printed them out, cut them out and glued them on.


The next step would be to finished the back wall of the lower section, do the floors and make some furniture.  That would be another blog post.